Introduction
I’m thrilled to introduce Google ADK (Agent Development Kit)! Initially announced at Google Cloud Next 2025 on April 9, 2025, and followed by the release of the Java version at Google I/O 2025 on May 20, ADK is Google’s official framework for building intelligent agents and orchestrating multi-agent workflows.
I had the chance to explore ADK recently—and I’m genuinely impressed. It’s not just about building standalone agents; ADK provides built-in workflow agents that help manage complex, multi-agent interactions through structured patterns.
I’ll be featuring ADK as one of the three recurring toolchains on my blog, alongside LangChain4j and Spring AI. For this first post, I want to simply introduce Google ADK by walking through the steps to build and run agents using its three core workflow patterns—Sequential, Loop, and Parallel. I’ll explore more advanced topics and deeper use cases in future articles.
If you’re curious, you can explore the official documentation here.
Also, I highly recommend reviewing the Google A2A (Agent-to-Agent) Protocol, announced in April 2025. It provides essential context for why frameworks like ADK matter in the future of interoperable, agentic systems.
Building Your First Google ADK Agent with Java
In this section, I’ll walk through my hands-on experience using the Google Java ADK (Agent Development Kit) alongside the ADK Dev Web UI. These steps demonstrate how I configured, implemented, and executed a multilingual agent workflow using the ADK tools.
Please visit here for more information about Google Java ADK and ADK Dev Web UI.
Please visit here for the example source codes.
Here’s a quick overview of the 6 steps I’ll walk through in this article:
- Create the agents folder – Organize your project so the Dev Web UI can detect your agents.
- Include the Google ADK libraries – Add dependencies for the core ADK and optionally the Dev Web UI.
- Declare agent name and user ID – Set up session identifiers used throughout the agent lifecycle.
- Initialize agents – Build LLM agents and define their workflow (Sequential, Loop, or Parallel).
- Create runner and session – Configure the runtime environment to execute and interact with agents.
- Set environment variables and run – Provide credentials and launch your agent in the Dev Web UI.
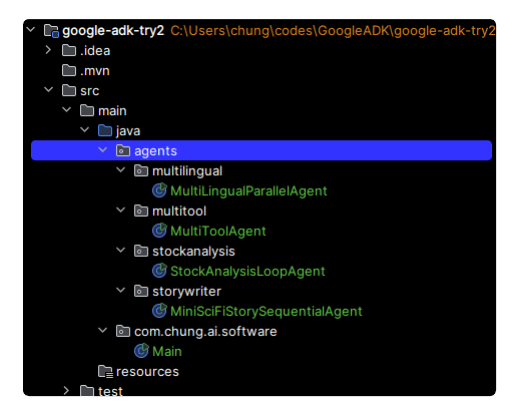
Step 1: Create agents folder
To enable agent discovery by the Dev Web UI, create a folder named agents within your source code directory structure like below. If you don’t want the Dev Web UI, you don’t have to create the folder.
Step 2: Include Google ADK library
I used maven for dependency management. You’ll need both the core ADK library and the optional Dev Web UI library:
<dependencies>
  <!-- The ADK Core dependency -->
  <dependency>
    <groupId>com.google.adk</groupId>
    <artifactId>google-adk</artifactId>
    <version>0.1.0</version>
  </dependency>

  <!-- The ADK Dev Web UI to debug your agent (Optional) -->
  <dependency>
    <groupId>com.google.adk</groupId>
    <artifactId>google-adk-dev</artifactId>
    <version>0.1.0</version>
  </dependency>
</dependencies>
If you’re using Gradle, use the following:
dependencies {
    implementation 'com.google.adk:google-adk:0.1.0'
    implementation 'com.google.adk:google-adk-dev:0.1.0'
}
🔍 Tip: You can omit google-adk-dev if you don’t need the Dev Web UI (e.g., for production use or CLI-only development).
Step 3: Declare Agent name and User Id
Before initializing agents, define a unique Agent name and User ID for the session:
private static String USER_ID = "student1";
    private static String NAME = "multilingual_parallel_agent";
Step 4: Initialize Agents
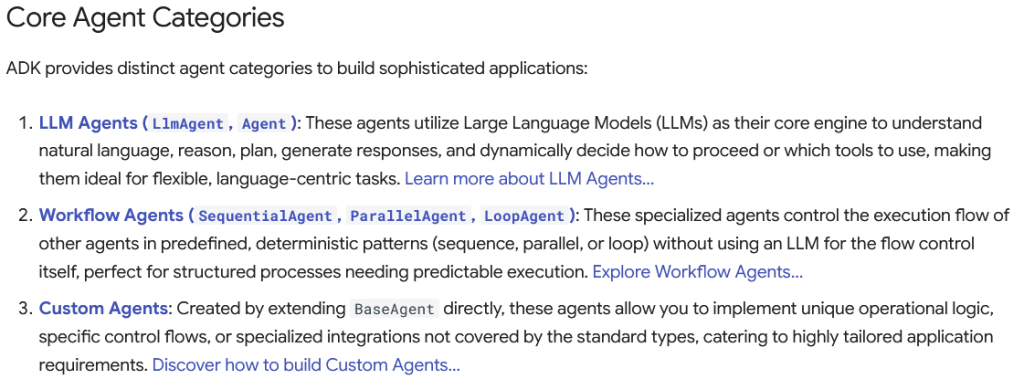
Define your individual LLM agents, then wrap them inside a workflow agent. The ADK supports three workflow types: SequentialAgent, LoopAgent, and ParallelAgent.
Here’s an example using ParallelAgent to create a multilingual response agent:
public static BaseAgent initAgent() {
        LlmAgent koreanAgent = LlmAgent.builder()
                .name("Korean Agent")
                .description("You are an agent that speaks in Korean.")
                .instruction("Response in Korean to the user's input.")
                .model("gemini-2.0-flash")
                .build();
        LlmAgent japaneseAgent = LlmAgent.builder()
                .name("Japanese Agent")
                .description("You are an agent that speaks in Japanese.")
                .instruction("Response in Japanese to the user's input.")
                .model("gemini-2.0-flash")
                .build();

        LlmAgent chineseAgent = LlmAgent.builder()
                .name("Chinese Agent")
                .description("You are an agent that speaks in Chinese.")
                .instruction("Response in Chinese to the user's input.")
                .model("gemini-2.0-flash")
                .build();

        return  ParallelAgent.builder()
                .name(NAME)
                .description("Invoke all agents to response in multiple languages.")
                .subAgents(koreanAgent, japaneseAgent, chineseAgent)
                .build();
    }
For more details on agent types and configurations, refer to the the ADK site.
Step 5: Create Runner & Session
With your agent initialized, create an InMemoryRunner and Session to manage the agent’s lifecycle and interactions:
public static BaseAgent ROOT_AGENT = initAgent();

InMemoryRunner runner = new InMemoryRunner(ROOT_AGENT);

        Session session = runner
                        .sessionService()
                        .createSession(NAME, USER_ID)
                        .blockingGet();

        try (Scanner scanner = new Scanner(System.in, StandardCharsets.UTF_8)) {
            while (true) {
                System.out.print("\nYou > ");
                String userInput = scanner.nextLine();

                if ("quit".equalsIgnoreCase(userInput)) {
                    break;
                }

                Content userMsg = Content.fromParts(Part.fromText(userInput));
                Flowable<Event> events = runner.runAsync(USER_ID, session.id(), userMsg);

                System.out.print("\nAgent > ");
                events.blockingForEach(event -> System.out.println(event.stringifyContent()));
            }
        }
This code allows for interactive input and prints multilingual responses to the terminal.
Step 6: Environment variables and Run
Create a .env file in the root directory and define the following variables (Note: Get an API key from Google AI Studio):
GOOGLE_GENAI_USE_VERTEXAI=FALSE
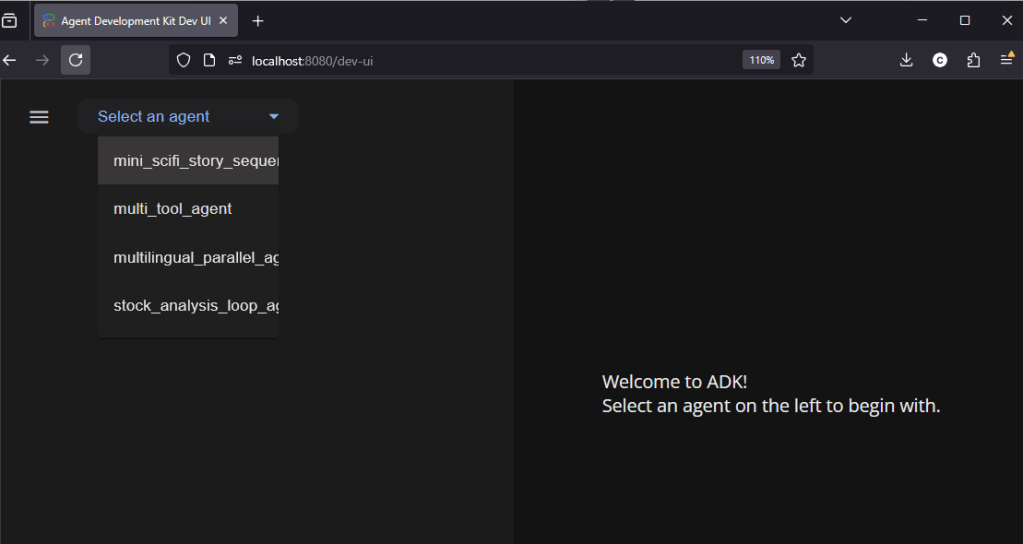
GOOGLE_API_KEY=PASTE_YOUR_ACTUAL_API_KEY_HEREmvn exec:java -Dexec.mainClass=com.google.adk.web.AdkWebServer -Dexec.args="--adk.agents.source-dir=src/main/java" -Dexec.classpathScope=compileOpen http://localhost:8080 in your browser to access the ADK Dev Web UI. You’ll see your agents listed in the dropdown and can start testing immediately.
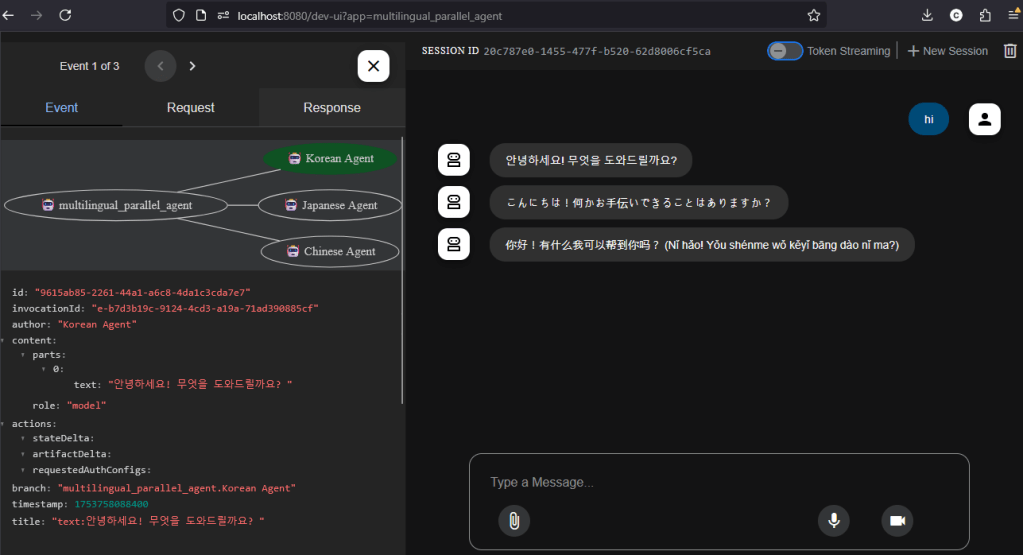
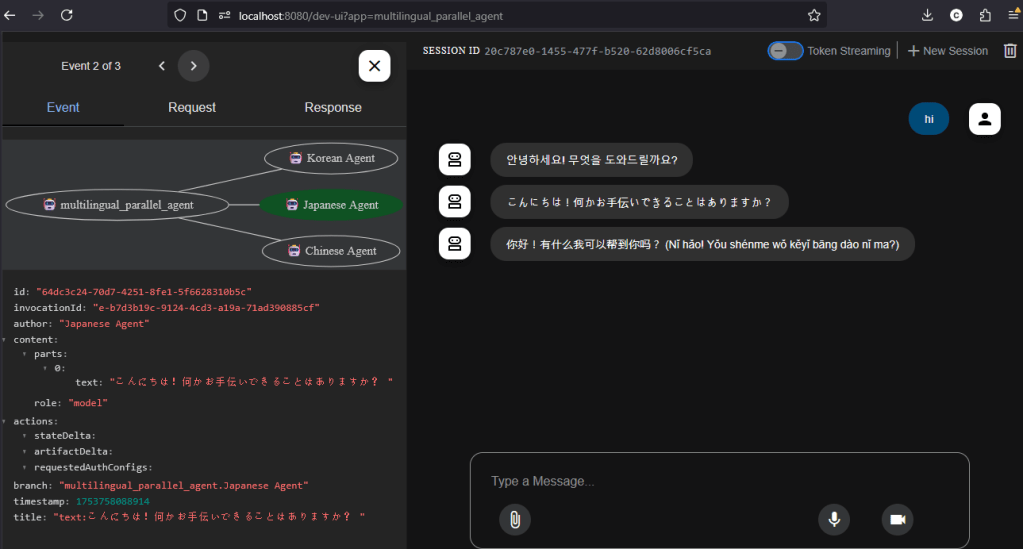
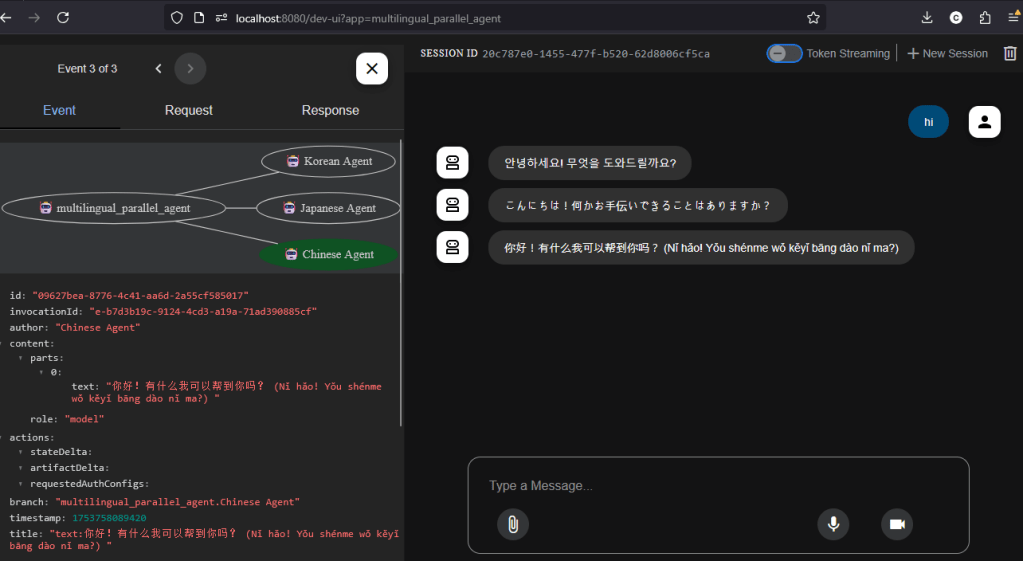
Live Demo Results
Here are three screenshots from my experiment demonstrating how
the MultiLingualParallelAgent responded in Korean, Japanese, and
Chinese. The Dev Web UI provided helpful visibility into each agent’s
response and the underlying event stream for debugging and analysis.
Conclusion
Google ADK offers a powerful and developer-friendly framework for building and orchestrating AI agents. In this article, I walked through the setup and implementation of agents using the three core workflow patterns—Sequential, Loop, and Parallel—while leveraging the Java ADK and Dev Web UI for a hands-on experience.
This is just the beginning. In future posts, I’ll explore more advanced features, integration patterns, and real-world use cases that highlight the full potential of ADK in multi-agent systems. Stay tuned!

Leave a comment